Git is a version control system. This means you can use it to
This guide teaches you how to use Git via the command line. There are a variety of GUIs, and Visual Studio Code has Git built in. I think it helps to learn using the command line to really master the concepts.
The easiest way is to use the version that ships with MacOS:
git --versionThis will prompt you to install Xcode if you haven’t already. Once it is
installed you should see something like this:
git version 2.39.5 (Apple Git-154)If you really want the latest version, you can install Homewbrew and then use:
brew install gitUse Git for Windows, which will get you Git BASH
for a command line version.
Install with your package manager
Do some basic configuration first:
git config --global user.name "YOUR NAME"git config --global user.email "YOUR-EMAIL"This way when you add code, git will associate your changes with your name and email address.
You may also want to configure an editor that you will use to edit commit messages:
git config --global core.editor "vim"I prefer to use vim. If you skip this step, then you will use your system’s
default editor.
When you are working with Git on your own machine, your actions look like this:
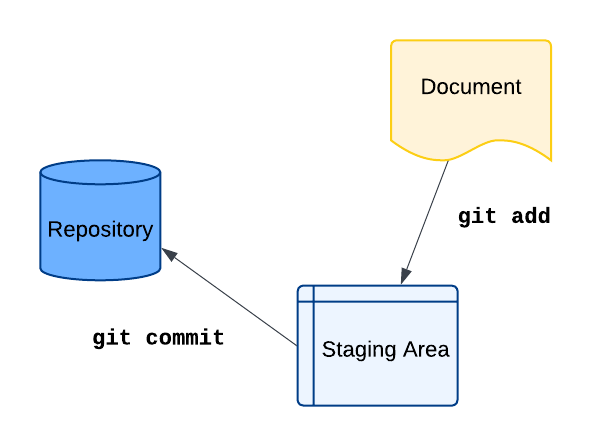
Every project gets its own repository. So you were building an app to keep track of ideas for writing a book, you would create a new repository for it. Meanwhile, if you had a website you were building for a friend’s knitting store, you would likewise keep that in a separate repository.
Let’s start with a project that contains text files. This way we don’t have to worry about whether you have the right setup for a programming language.
Open a terminal. On MacOS, use the built-in terminal or any other terminal you
have installed. On Windows, use Git Bash.
mkdir poetrycd poetrygit initThis:
poetryYou should see a message after the last step:
Initialized empty Git repository in /Users/zappala/poetry/.git/Take a look around:
ls -alYou should see something like this:

Git will store all of your versions in the hidden .git directory. If you list
what is there:
ls -al .gityou should see:
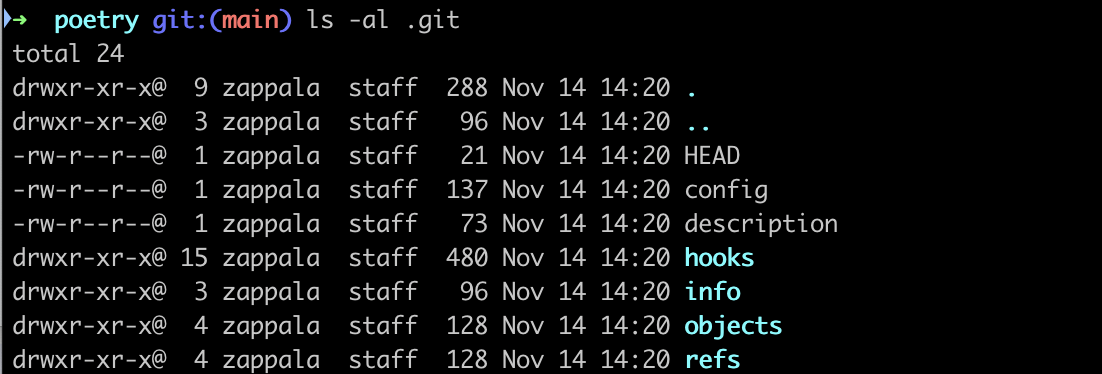
This is where git is keeping track of different versions of your code, along with some configuration files. We won’t go into the details of what is stored here, just know that this is a very important directory. It is Git repository.
Using your favorite editor, add a file to this project, called
the-read-wheelbarrow.txt, with the following poem:
so much dependsupon
a red wheelbarrow
glazed with rainwater
beside the whitechickens
This is a famous poem by William Carlos Williams.
Now type:
git statusYou should see something like this:

main branch. We’ll talk more about branches later.To add this new file to your Git repository, type:
git add the-read-wheelbarrow.txtNow check the status again:
git statusNow you should see the added file:

Notice how this says that your new file is a change to be committed. What you have done is placed your file in a staging area. This allows you to prepare a set of changes carefully, including adding and removing files as you see fit, before committing those changes to your repository.
You can finalize your commit with:
git commitThis will open the editor you configured, e.g. vim, to edit a commit message:
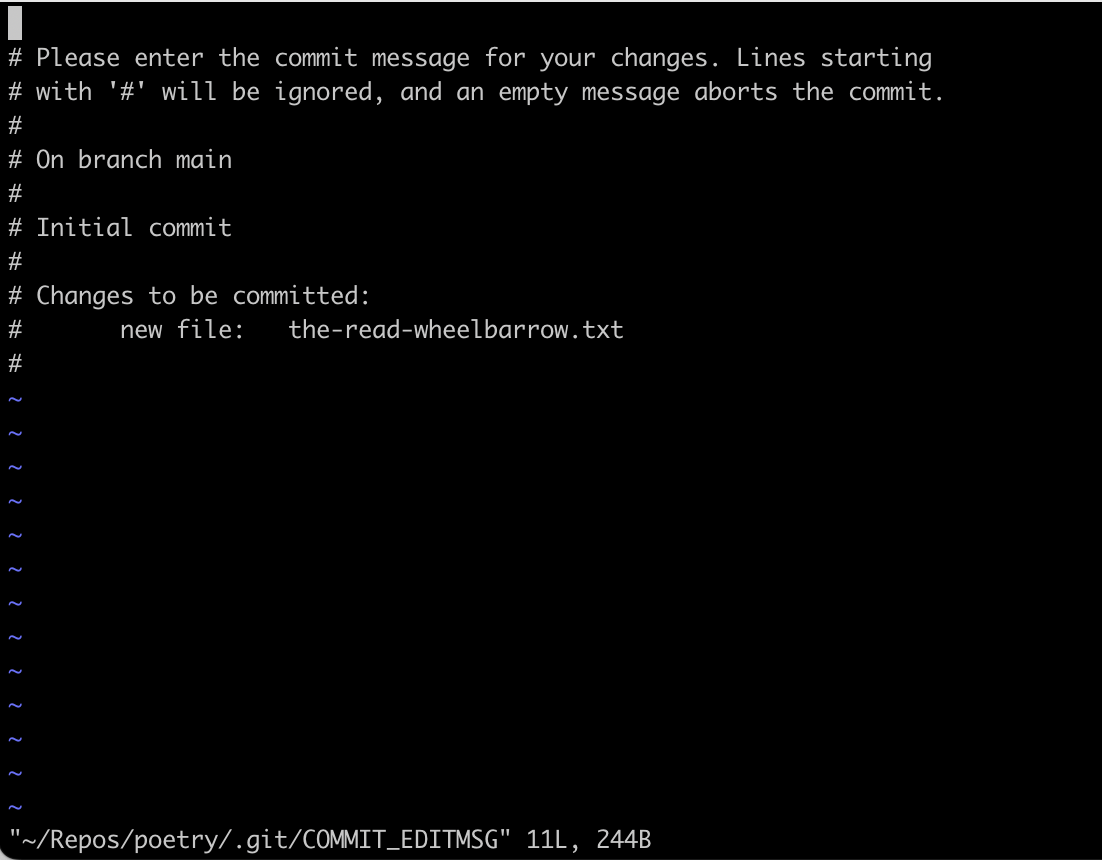
You can enter a message here, save and quit, and then your commit is done:

Notice how it tells you that you changed 1 file and inserted 11 lines.
For best practices, commit messages should contain details about exactly what you are committing. If you’re writing code, you might explain the new functionality you have added, or the bug you have fixed. Detailed commit messages help your team know exactly what you did, and can likewise help your future self to remember what you were doing. We also often wrap commit messages at 80 characters so they show up well on a terminal.
For very short commit messages, you may alernatively use:
git commit -m "Added a poem"Let’s take a look at what we have done so far:
git logYou will see a log of all the commits you have made so far, which should be just one:

Each commit has a SHA-1 hash, giving it a unique identifier, an author, a date,
and a commit message. This uses a pager, so you need to type q to exit.
If you want to see more detail, add the -p flag, which stands for patch.
This shows you the details of what was added and removed, using a common patch
format.
git log -p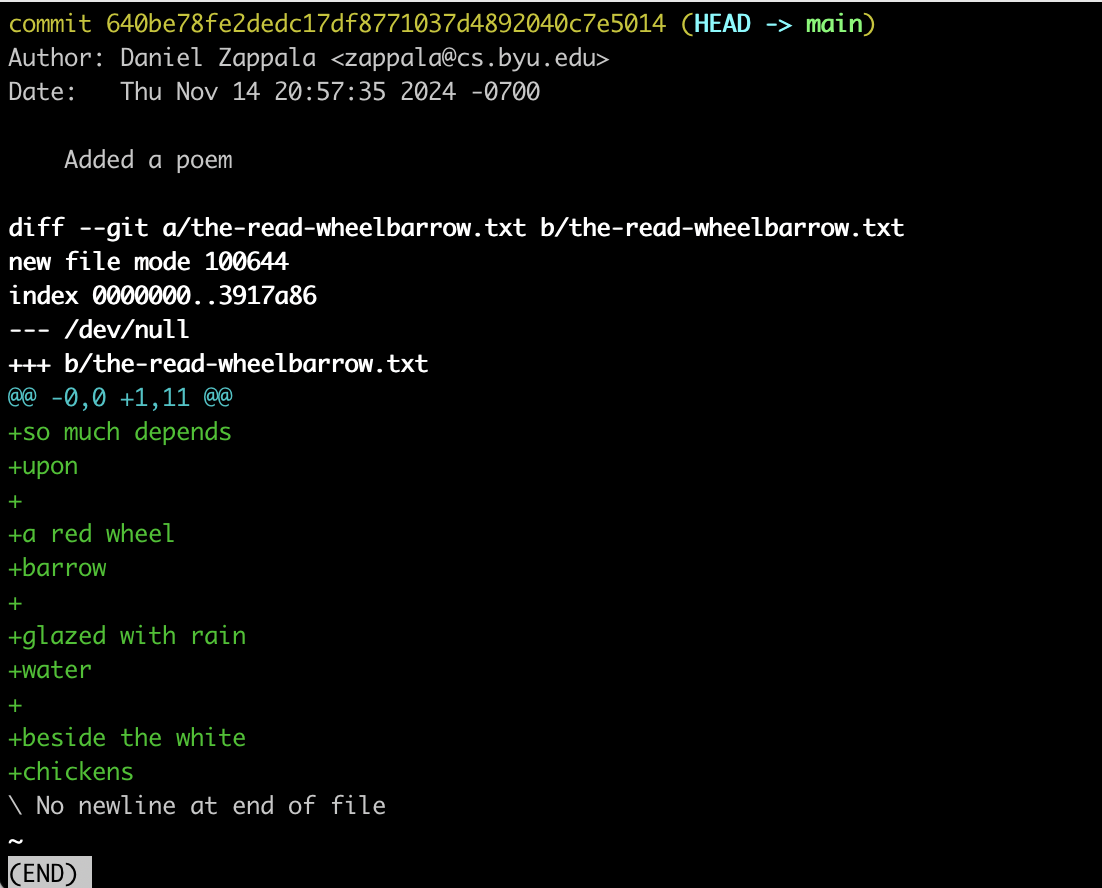
All of the added lines are prefaced with a +.
Edit the poem and make some changes to it on several lines. Then run:
git status
This shows that git sees that the file has been modified. You can commit the change in one line with:
git commit -aor
git commit -a -m "changed a few lines"depending on whether you want to use the editor. The -a flag tells git to
automatically stage and then commit all files that have been modified. We did
not need to use git add to add any new files.
You should see:

You can also view the log to see the changes:
git log -p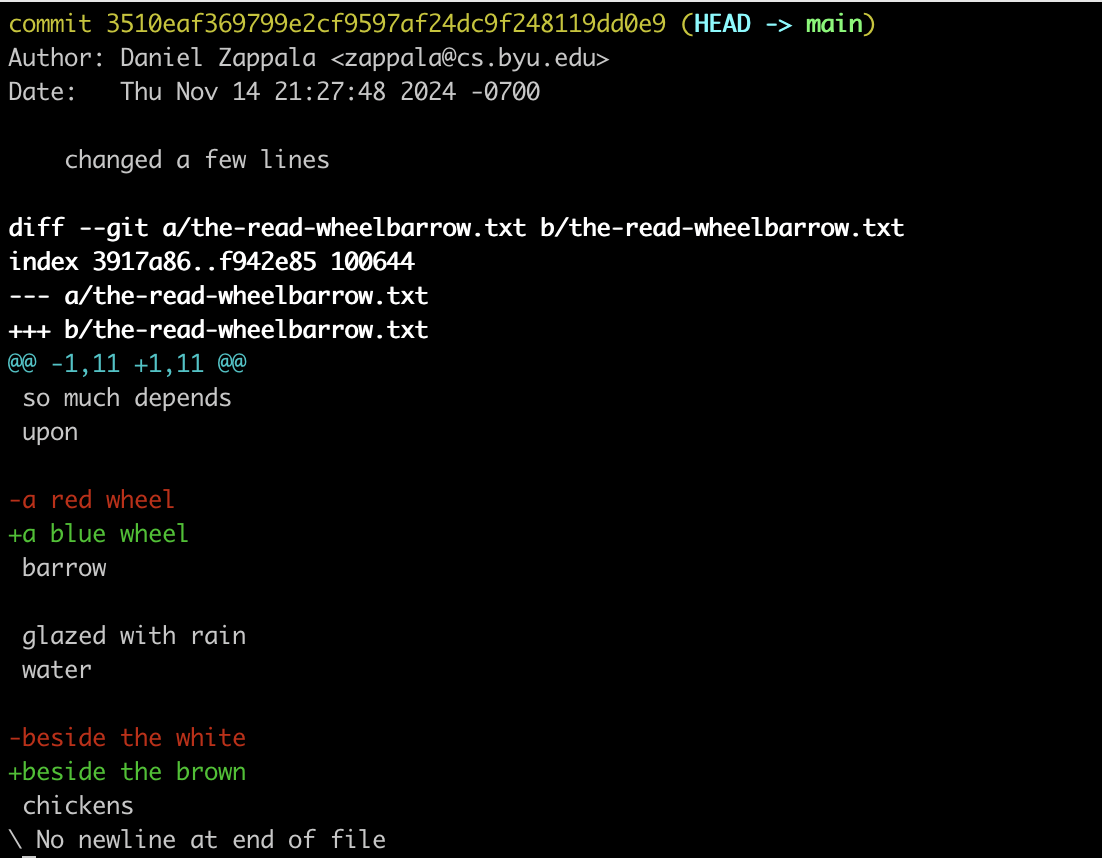
Notice how Git shows your changes in patch format, with removed and added lines.
When you build up a commit history, you have a chain of versions:

We’ll talk about how to access those older versions later.
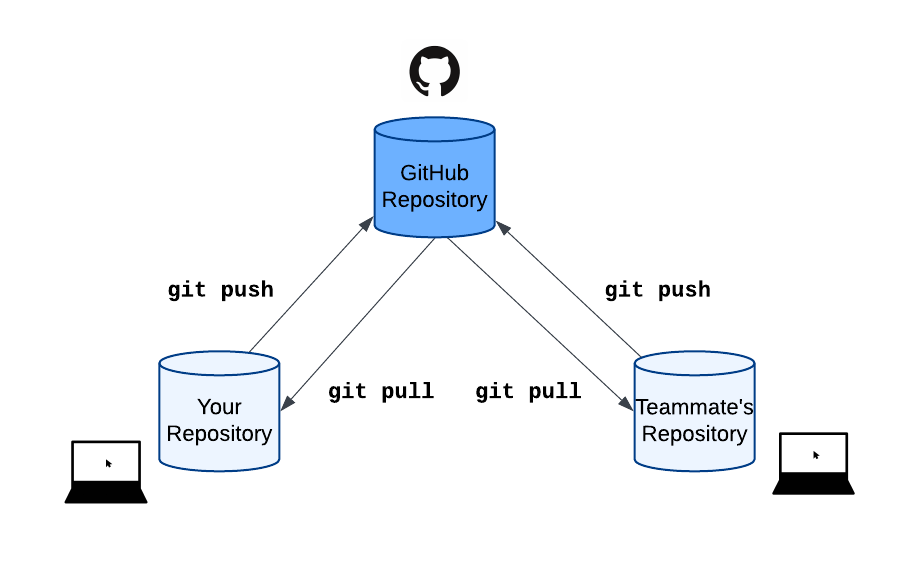
Git is a distributed version control system. When you work on a team, you can share repositories through a central system, such as GitHub, GitLab, or BitBucket. In that case, you and your teammates are synchronizing your repositories with the service you are using:
To start with GitHub, you’ll need to create an account on GitHub.
Once you do that, you should add an SSH key to your GitHub account.
We’re going to take your poetry repository and push it to GitHub. To start, create a new repo by clicking this button in the top left:
Fill out the form, but don’t click the box to add a README. You do need to decide whether your repository will be public or private.
Once you are done creating the repository as described above, you will have an empty repository. Then you’ll see these instructions:
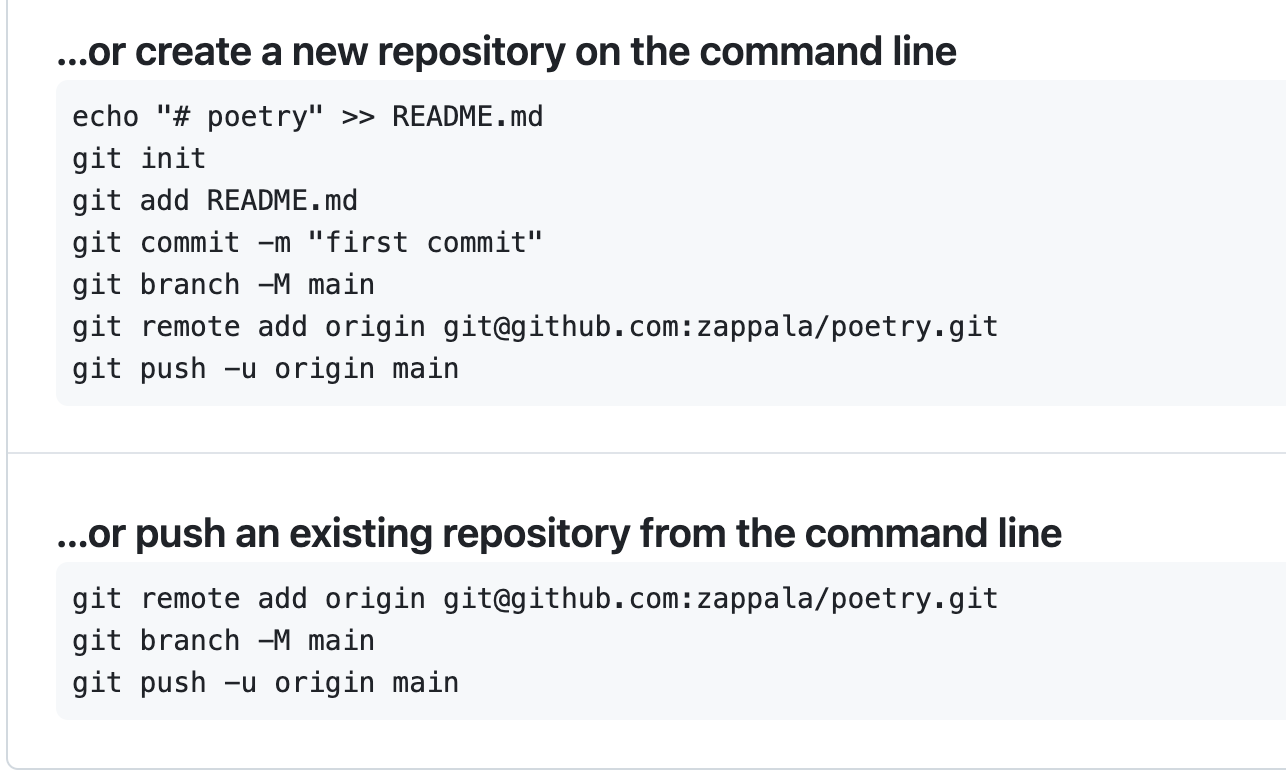
Since you have an existing repository, follow the bottom instructions:
git remote add origin git@github.com:zappala/poetry.gitgit push -u origin main(Note there is another command GitHub proposes to rename the “master” branch to “main”. But your repository probably already uses “main” for the new branch. This is part of a larger movement to remove “master/slave” terminology from computer science, because it is insensitive, and instead using “main” or “primary” and “secondary” or “backup” instead.)
The first command adds a remote repository to your configuration. This lets you sychronize the repository on your local machine with the one you just created on GitHub.
The second command pushes your local repository to the remote repository. This will copy all the versions you have created to the remote repository so they are identical.
Try this out:
git add, git commit -am "message" to commit locallygit push to push to GitHubNormally if you are working alone on a project, every time you push it will succeed. However, if you are working on a team, conflicts could arise. We’ll discuss that later.
You can clone a repository by using the git clone command. To start, find a
repository you want to clone. You can use
this small test repo.
Click the Code button:
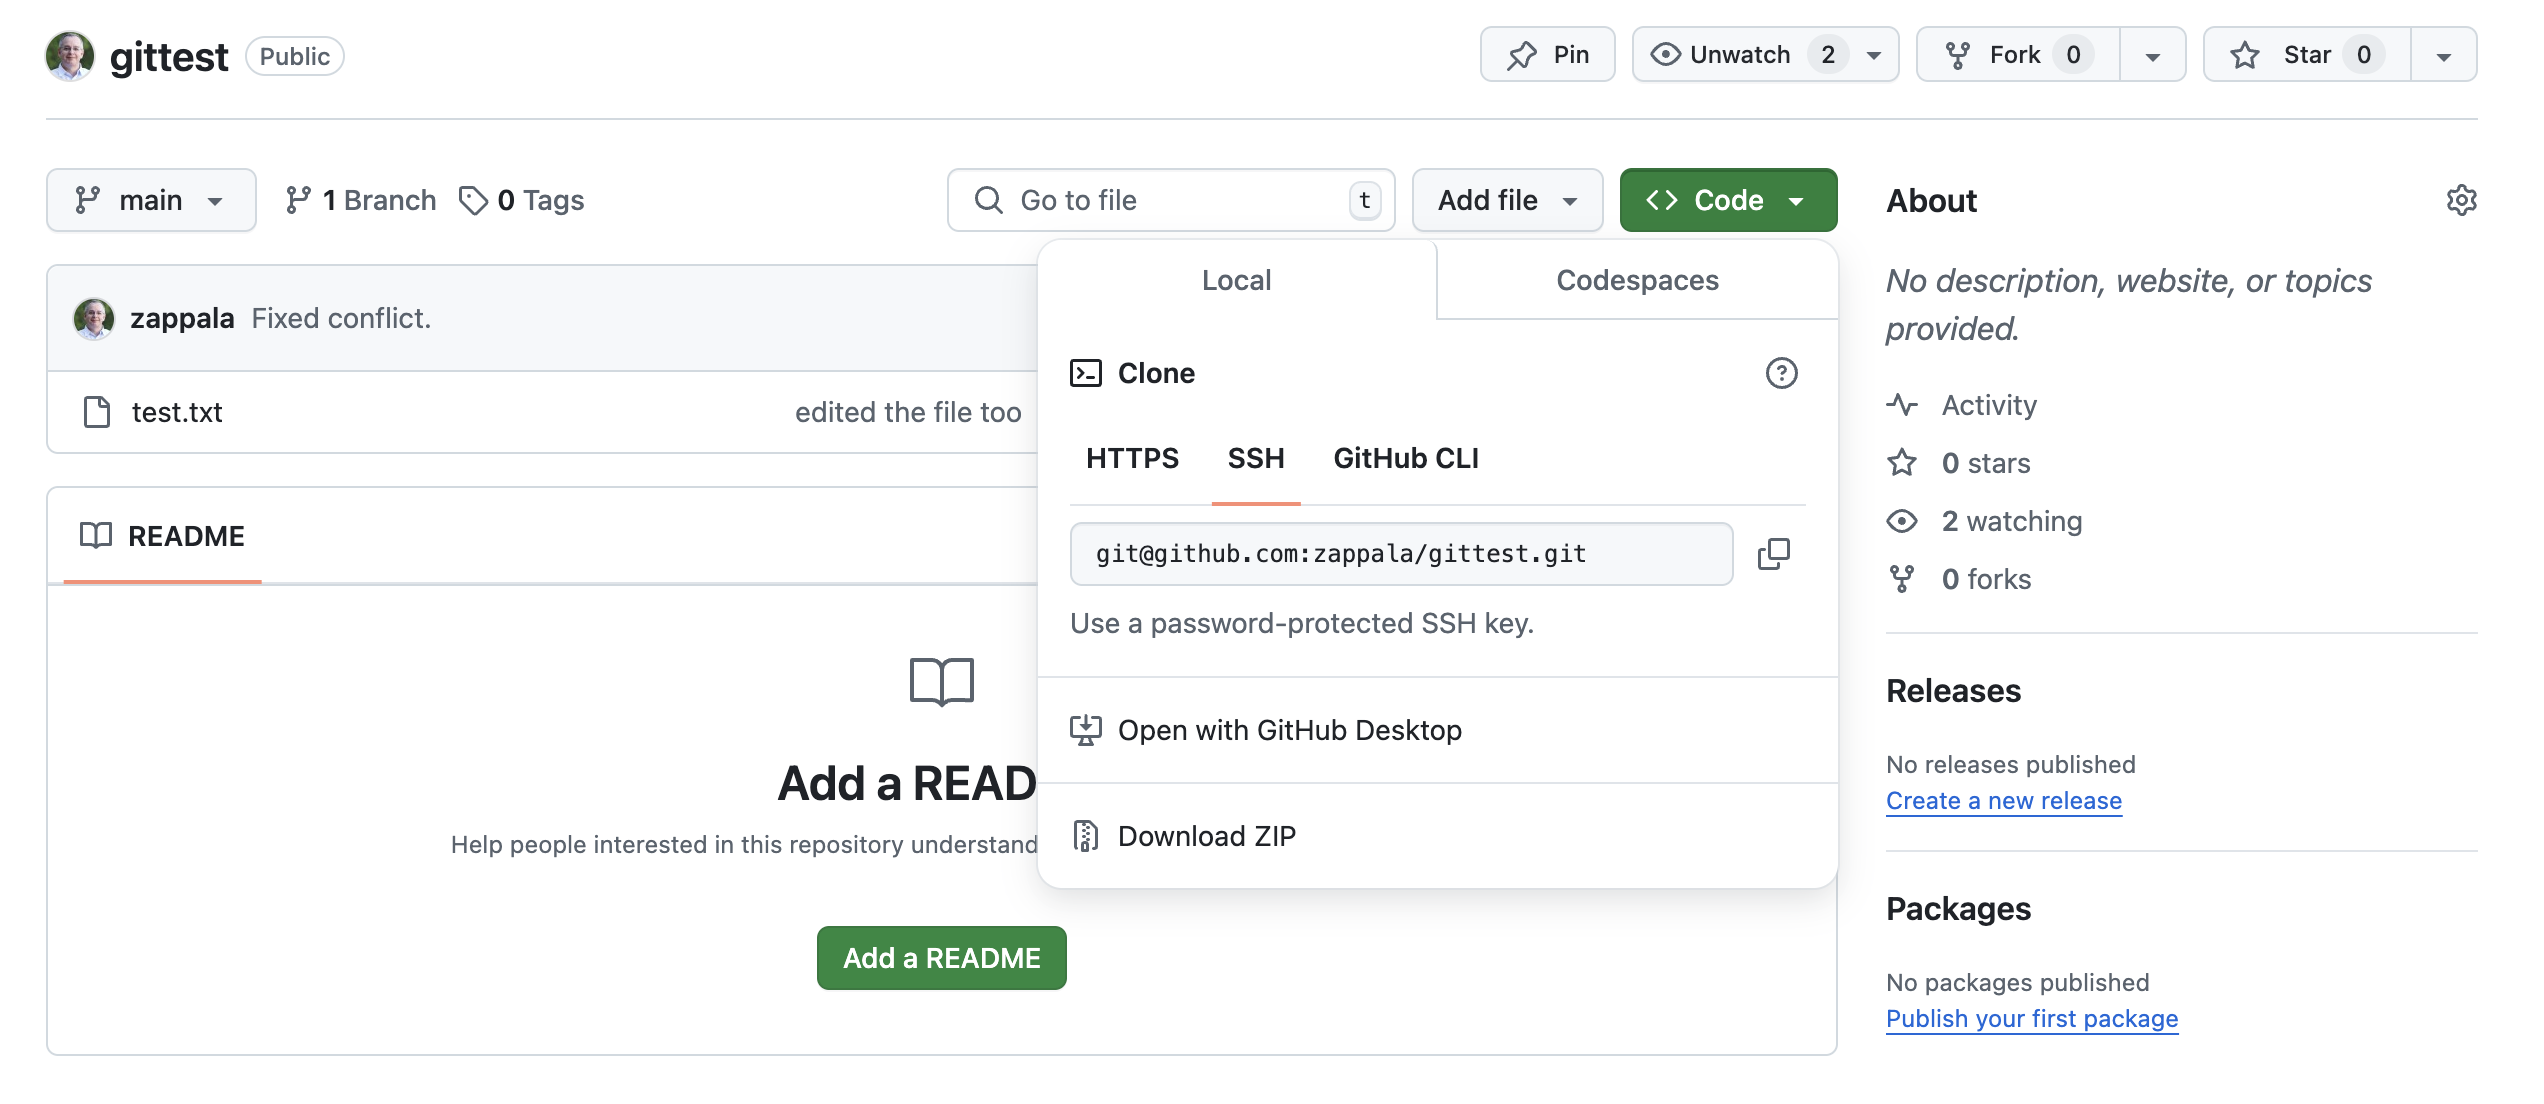
Normally, you should use SSH to clone. Alternatively, you could setup access
tokens if you want to use HTTPS.
For example, you can clone this repository with:
git clone git@github.com:zappala/poetry.gitNow practice using GitHub with a friend:
poetry repository on GitHub.Settings→Collaborators and use the Add people button to add your
friend.git pull to pull the changes and sync with your local repositoryOften, you will have teammates making changes at the same time. If you make conflicting changes, you’ll end up with a Git conflict. Let’s show you how to resolve this.
git push. This will succeed.git push. You should see a message like this:Merge branch 'master' of git@github.com:username/repository.git ! [rejected] main -> main (fetch first)error: failed to push some refs to 'git@github.com:username/repository.git'hint: Updates were rejected because the remote contains work that you dohint: not have locally. This is usually caused by another repository pushinghint: to the same ref. You may want to first merge the remote changes (e.g.,hint: 'git pull') before pushing again.hint: See the 'Note about fast-forwards' in 'git push --help' for details.Let’s talk about what this means!
Since your local repository is not synchronized with the remote repository on
GitHub, you need to pull in those changes. Try using git pull. You’ll now see
something like this:
remote: Counting objects: 8, done.remote: Compressing objects: 100% (8/8), done.remote: Total 8 (delta 0), reused 2 (delta 0)Unpacking objects: 100% (8/8), done.From git@github.com:username/repository.git 153782f..10e0b68 main -> origin/mainCONFLICT (content): Merge conflict in poem.txtAutomatic merge failed; fix conflicts and then commit the result.At this point, any files listed with CONFLICT next to them will have both
your code and your friend’s code. They will be clearly marked! And Visual Studio
Code has a really nice
3-way merge editor
to help you resolve the conflict.
If you look at the file with a conflict, you will see something like this:
<<<<<<< HEADyour friend's line of poetry=======your line of poetry>>>>>>> (commit hash)You can see the markers: <, =, and > marking the different versions.
Choose which version you want, delete the lines with markers, and use
git commit to commit the change. Now you can use git push to push the fixed
version, and your friend can use git pull to get the new version.
If we have time, we’ll follow the Git Book to learn about Git Branches in a Nutshell and Git Branching - Basic Branching and Merging.
Once you understand branching, you can consider a basic branching strategy. See for example:
You can look at any of these versions using the commit hash. For example:
git checkout 640be78fe2dedc17df8771037d4892040c7e5014If your editor is open, you’ll likely see the file you are editing revert to its older version. Git will warn you that you have checked out an old version:
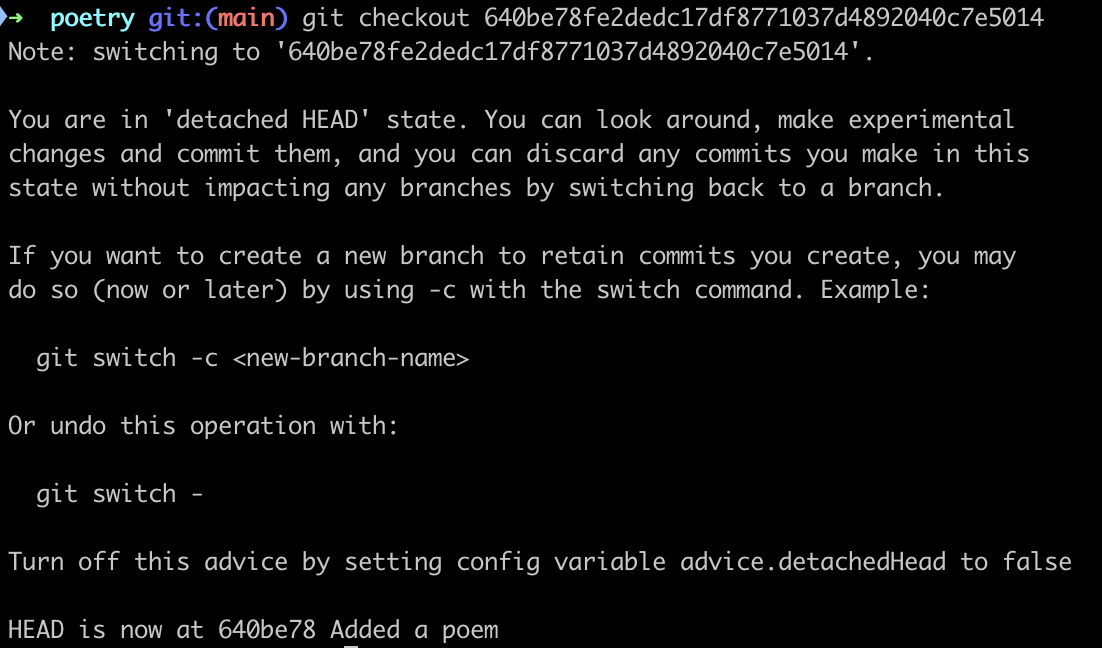
You can go back to the original with git checkout main.
If you prefer a GUI, you can use integrations in Visual Studio Code, or you can try GitHub Desktop